Unlock Culinary Convenience: The Magic of Homemade Garlic Paste
In the bustling world of modern kitchens, anything that can shave off precious minutes without compromising flavor is a game-changer. Enter homemade garlic paste – a simple yet incredibly powerful culinary hack that promises to revolutionize your cooking routine. Imagine reaching into your fridge or freezer and instantly having fresh, potent garlic ready for any dish. No more tedious peeling, no more sticky fingers, just pure garlicky goodness at your fingertips.
Learning how to make garlic paste isn't just about saving time; it's about elevating your cooking with the vibrant, fresh taste that store-bought alternatives often lack. This comprehensive guide will walk you through every step, from selecting the best garlic to clever storage tips, ensuring your kitchen becomes a more efficient and flavorful haven.
Why Homemade Garlic Paste is Your Kitchen's New Best Friend
While minced garlic in a jar might seem convenient, there's a world of difference when you compare it to the freshness and potency of homemade garlic paste. This isn't just a convenience item; it's an ingredient that truly enhances your food.
- Superior Flavor & Aroma: Store-bought options often contain preservatives and lack the bright, pungent kick of freshly processed garlic. Homemade paste retains all the essential oils and powerful flavors that elevate any dish.
- Unbeatable Freshness: You control the ingredients, ensuring your paste is free from unwanted additives and bursting with natural flavor.
- Significant Time Saver: Peeling and mincing garlic for every meal can be tiresome. Preparing a batch of paste once a week or month means instant garlic access whenever you need it, speeding up your weekday cooking significantly. This ties directly into Unlock Faster Cooking: The Power of Homemade Garlic Paste, highlighting the efficiency it brings.
- Cost-Effective: Buying whole garlic heads is usually more economical than purchasing pre-minced or jarred garlic paste, allowing you to get more mileage out of your grocery budget. As discussed in Homemade Garlic Paste: Store Freshness, Save Time & Money, the financial benefits are clear.
- Zero Waste: You use the freshest garlic, and any excess can be stored, minimizing food waste.
- Enhances Meal Prep: Like making ginger paste or onion-tomato bhuna masala, garlic paste is a fantastic addition to any weekend meal prep routine, setting you up for healthier, quicker meals throughout the week.
Your Simple Recipe Guide: How to Make Garlic Paste
Making garlic paste is surprisingly straightforward. All you need are a few basic ingredients and equipment, and you'll be well on your way to culinary nirvana. The key is to blend garlic cloves with a touch of oil until a smooth, uniform consistency is achieved.
What You'll Need:
- Garlic Heads (Bulbs): The star of the show! Choose firm, unblemished garlic. The quantity depends on how much paste you want to make. A typical head contains 10-12 cloves.
- Olive Oil (or Neutral Oil): Extra Virgin Olive Oil is highly recommended for its smooth texture and rich flavor profile, which complements garlic beautifully. However, if you prefer a less dominant oil or plan to use the paste in dishes where olive oil might clash, neutral-flavored oils like avocado oil or canola oil are excellent alternatives. Avoid strong-flavored oils that could overpower the delicate garlic essence.
- Food Processor or Blender: These are your best friends for achieving that silky smooth paste. A powerful motor will make quick work of the cloves.
- Airtight Storage Container(s): For preserving your paste.
Step-by-Step Instructions:
- Prepare the Garlic: This is arguably the most labor-intensive part, but there are hacks!
- Peeling Hack 1 (The Smash): Place a garlic clove on a cutting board. Lay the flat side of a chef's knife over it and gently smash it with the heel of your hand. The skin should loosen and peel away easily.
- Peeling Hack 2 (Shake & Bake): Separate the cloves. Place them in a sturdy bowl with another bowl of the same size inverted over it, creating a sealed sphere. Shake vigorously for 30-60 seconds. The skins should largely come off.
- Peeling Hack 3 (Hot Water Soak): Briefly soak cloves in hot (not boiling) water for a minute. The skins will become easier to slip off.
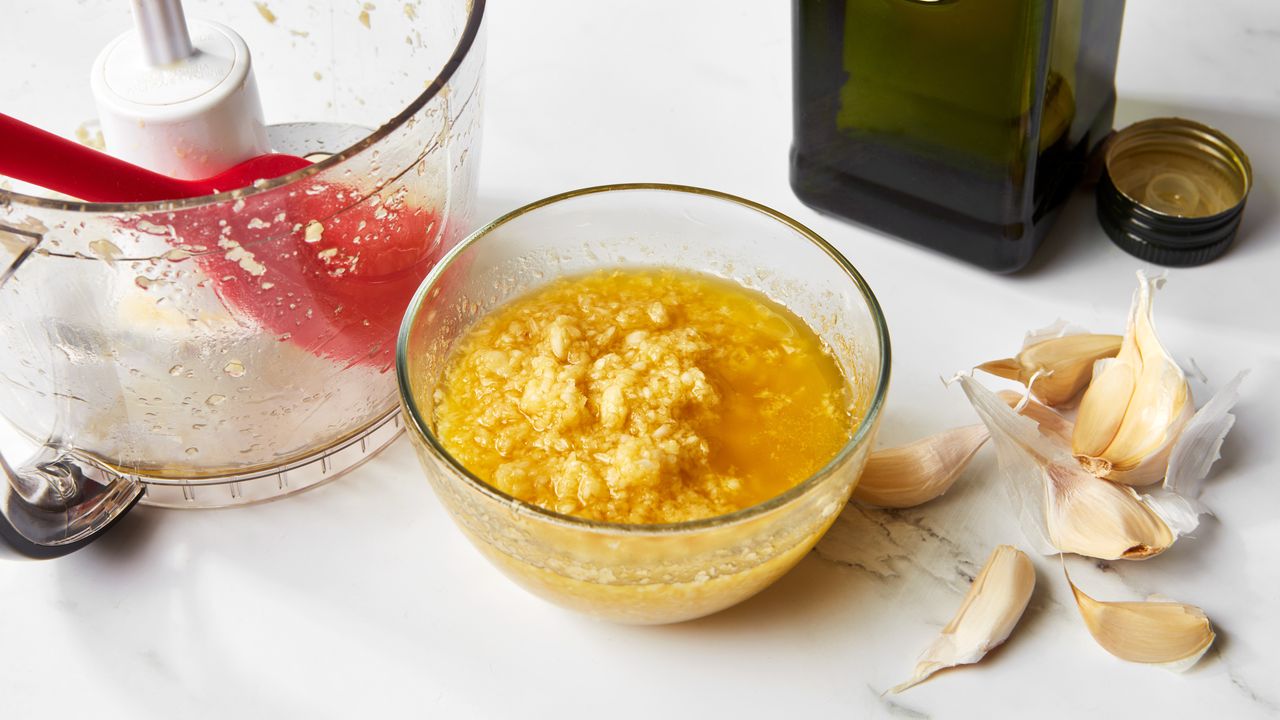
- Combine Ingredients in Processor: Add your peeled garlic cloves to the bowl of your food processor or blender. Pour in a small amount of your chosen oil. Start with less oil than you think you need – you can always add more. A good starting ratio is about 1 tablespoon of oil per cup of garlic cloves, but adjust to achieve desired consistency.
- Blend to Perfection: Secure the lid and process the mixture. Begin with short pulses, then blend continuously. You'll need to stop occasionally, open the lid, and use a spatula to scrape down the sides of the bowl. This ensures all garlic chunks are incorporated and processed into a uniform, smooth paste. Continue blending and scraping until no large pieces remain and you have a beautifully creamy consistency.
- Final Check & Adjust: Give the paste a quick smell and taste (if you dare!). If it feels too thick, add a tiny bit more oil and blend again. It should be a smooth, spreadable consistency, not watery.
Expert Tips for the Perfect Garlic Paste
- Don't Overdo the Oil Initially: Too much oil at the start can result in a thinner, less concentrated paste. Add it gradually until you reach your desired consistency.
- Concentration Matters: Remember, garlic paste is more concentrated than finely minced garlic. A good rule of thumb is that one garlic clove is roughly equivalent to ½ teaspoon of garlic paste. When a recipe calls for minced garlic, use slightly less paste for an equivalent flavor punch.
- Traditional Method (No Blender? No Problem!): If you don't have a food processor or blender, you can still make excellent garlic paste. Finely mince your peeled garlic on a cutting board. Sprinkle it with a pinch of coarse salt (this acts as an abrasive and helps break down the cell walls). Then, use the flat side of your knife to smash and drag the garlic-salt mixture across the board until it forms a paste. Finally, mix in your preferred oil. A mortar and pestle also work wonderfully for this method.
Storage Solutions: Keeping Your Garlic Paste Fresh and Flavorful
One of the biggest advantages of making your own garlic paste is the ability to store it for future use, making meal prep a breeze. Proper storage is crucial for both freshness and safety.
Refrigeration:
For short-term storage (up to 1-2 weeks), the refrigerator is ideal.
- Transfer your freshly made garlic paste into a clean, airtight container.
- The Oil Layer Trick: To further preserve freshness and prevent discoloration, pour a thin layer of olive oil over the top of the paste before sealing. This creates a barrier against air, significantly extending its refrigerated shelf life.
- Store in the coldest part of your refrigerator.
Freezing:
For longer-term storage (up to 3-4 months), the freezer is your best friend. This method is particularly useful for larger batches.
- Ice Cube Tray Method: Spoon the garlic paste into ice cube trays. Each cube typically holds about 1-2 tablespoons, which is a convenient portion size for most recipes.
- Freeze until solid (a few hours).
- Once frozen, pop the garlic paste cubes out of the trays and transfer them into a freezer-safe, airtight bag or container. Label with the date.
- Use Directly from Frozen: The beauty of frozen garlic paste is that you can add the cubes directly to your hot pan, sauce, or stew – no thawing required! This is a fantastic time-saver.
Beyond the Jar: How to Use Your Homemade Garlic Paste
Your freshly made garlic paste is incredibly versatile. Here are just a few ideas to get you started:
- Marinades: A cornerstone of any good marinade for meats, poultry, fish, or vegetables.
- Sautéing Base: The perfect aromatic start for stir-fries, curries, soups, and stews.
- Dressings & Dips: Whisk into salad dressings, hummus, or creamy yogurt dips for a burst of flavor.
- Spreads: Mix with butter for a quick garlic bread spread, or stir into cream cheese for a savory bagel topping.
- Indian & Asian Cuisines: Many recipes in these cuisines call for substantial amounts of garlic, often alongside ginger. Having paste ready simplifies the process immensely.
- Roasting: Toss with vegetables or rub onto roasts before baking for deep flavor.
Conclusion
Mastering how to make garlic paste is a small step that yields monumental returns in your kitchen. It's a testament to the power of simple meal prep, offering unparalleled freshness, convenience, and control over your ingredients. By investing a little time upfront, you'll unlock faster cooking, richer flavors, and a more enjoyable culinary journey. So, gather your garlic, fire up your food processor, and prepare to elevate your everyday meals with this essential homemade staple!
Happy cooking!
